Summer electricity bills can climb quickly when your air conditioner runs for hours every day. If you’re wondering how to lower AC bill costs without sacrificing comfort, the good news is that many effective improvements don’t require replacing your cooling system.
Small changes to thermostat settings, air filters, window coverings, and household routines can reduce unnecessary cooling demand. Larger improvements, such as air sealing, insulation, and HVAC upgrades, may provide additional benefits.
Read Also: Best Thermostat Settings for Summer and Winter (Save Money, Stay Comfortable)
However, not every popular energy-saving tip works equally well. Some changes offer modest savings, while others solve problems that make an air conditioner work harder than necessary.
This guide covers 15 practical ways to reduce air conditioning costs, explains which improvements are worth considering first, and shows how to estimate potential savings using your actual electricity rate.
Whether you own a house or rent an apartment, you’ll find options for different budgets, climates, and cooling systems.
Quick Takeaways
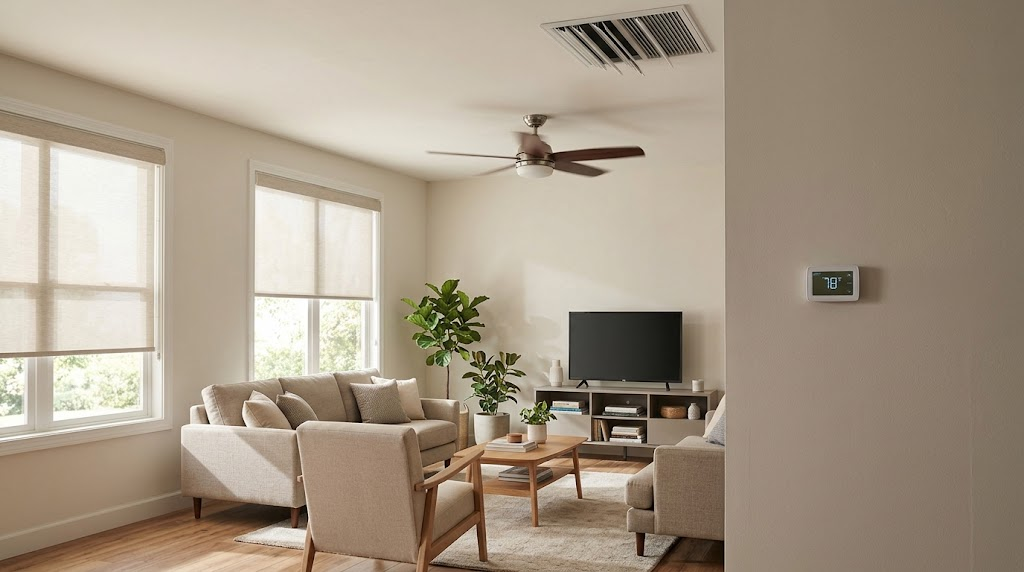
- Start with your thermostat. Raising the cooling setting a few degrees can reduce electricity consumption.
- Check your AC filter. Restricted airflow can reduce cooling performance and contribute to equipment problems.
- Block unwanted sunlight. Window coverings and exterior shading can reduce summer heat gain.
- Use ceiling fans strategically. Moving air can help occupants feel comfortable at warmer thermostat settings.
- Seal obvious air leaks. Uncontrolled outdoor air entering your home increases cooling demand.
- Maintain your equipment. Professional AC maintenance can identify problems affecting efficiency.
- Compare costs before upgrading. A newer, higher-efficiency air conditioner isn’t automatically the most economical choice.
- Measure actual results. Electricity bills, smart thermostat reports, and utility usage data can help you evaluate changes.
Why Your AC Bill Is So High
Your air conditioner uses electricity to move heat from inside your home to the outdoors.
Unlike a furnace, which typically generates heat, an air conditioner uses a refrigeration cycle to absorb indoor heat and release it outside.
Read Also: HVAC Efficiency Guide: How to Cut Heating and Cooling Costs
The system’s compressor, fans, and controls all consume electricity.
How much electricity your AC uses depends on several factors:
- Outdoor temperature and humidity.
- Thermostat settings.
- Home size and insulation.
- Window size, orientation, and shading.
- Equipment efficiency and condition.
- Air leakage and duct performance.
- Household occupancy and daily routines.
Understanding AC Electricity Consumption
Electricity consumption is measured in kilowatt-hours, abbreviated kWh.
One kWh represents using 1,000 watts of electrical power for one hour.
For example, suppose an air-conditioning system draws an average of 3,000 watts while operating.
That’s 3 kilowatts (kW).
If it operates for six equivalent full-power hours:
3 kW × 6 hours = 18 kWh
At an electricity rate of $0.17 per kWh:
18 kWh × $0.17 = $3.06
Over 30 days, that would equal approximately $91.80 in cooling electricity costs.
This is a simplified example. Actual AC electrical demand changes with equipment type, operating conditions, and fan usage.
Why Summer Bills Can Increase Even Without Changing Your Thermostat
An unusually hot summer can make your AC operate longer to maintain the same indoor temperature.
Humidity also matters.
In humid weather, air conditioners must remove both heat and moisture.
Heat removal associated with changing air temperature is called sensible cooling.
Moisture removal is called latent cooling.
Both affect system workload.
Electricity prices can also change, including through time-of-use rates that charge different prices depending on the time of day.
Before assuming your AC is malfunctioning, compare your current electricity consumption with previous periods and consider differences in weather.
Understanding these factors makes it easier to identify improvements that address the actual cause of high cooling costs.
Read Also: Energy-Saving Myths: 12 Mistakes That Cost You Money (What Actually Works)
15 Ways to Lower Your AC Bill
The following AC efficiency tips range from simple adjustments to larger home improvements.
Start with low-cost changes before considering expensive equipment replacements.
1. Raise Your Thermostat a Few Degrees
Typical cost: $0
One of the simplest ways to reduce cooling demand is to increase your thermostat setting.
The U.S. Department of Energy recommends setting your thermostat as high as comfortably possible during summer.
For many households, approximately 78°F is a useful starting point when cooling is needed.
However, 78°F isn’t comfortable or appropriate for everyone.
If your thermostat is currently set to 72°F, try increasing it to 74°F or 75°F.
After several days, determine whether you can comfortably raise it another degree.
Why This Works
Your home gains heat from the outdoors.
When the indoor temperature is closer to the outdoor temperature, heat generally enters more slowly.
That means your AC has less heat to remove.
DIY steps:
- Record your current thermostat setting.
- Increase the cooling temperature by 1°F–2°F.
- Use a fan in occupied rooms if needed.
- Monitor comfort and indoor humidity.
- Compare electricity use over similar weather conditions.
Avoid prioritizing energy savings over the needs of people who are sensitive to heat.
For a complete seasonal schedule, see our related guide: Best Thermostat Settings for Summer and Winter.
2. Use a Programmable or Smart Thermostat
Typical equipment cost: $25–$250+
A programmable thermostat automatically adjusts temperatures according to a schedule.
A smart thermostat adds features such as smartphone control, occupancy detection, and energy reports.
Both can help reduce unnecessary cooling when nobody is home.
For example, a conventional AC schedule might use:
| Time | Cooling setting |
|---|---|
| 6 a.m. | 76°F |
| 8 a.m. | 82°F |
| 5 p.m. | 76°F |
| 10 p.m. | 75°F |
This example assumes the home is empty during the workday.
It may need adjustments for humidity, pets, health requirements, and the home’s ability to cool down before occupants return.
Can a Smart Thermostat Pay for Itself?
Potentially, but the answer depends on how you currently operate your AC.
According to the Department of Energy, suitable thermostat setbacks can save up to 10% annually on heating and cooling under certain conditions.
That estimate doesn’t mean every smart thermostat saves 10%.
If you already maintain efficient temperatures manually, a smart thermostat may provide more convenience than additional energy savings.
Check compatibility before purchasing, especially for heat pumps, multistage systems, and equipment requiring special thermostat controls.
Hire a licensed electrician or qualified HVAC technician if installation requires wiring changes.
3. Replace or Clean Your AC Air Filter
Typical cost: $5–$40 per replacement filter
A dirty air filter can restrict airflow through your cooling system.
Restricted airflow may reduce cooling performance, increase operating time, and contribute to equipment problems.
The Department of Energy identifies filter maintenance as an important part of efficient air-conditioning operation.
How Often Should You Change an AC Filter?
There isn’t one schedule for every household.
Replacement frequency depends on:
- Filter type.
- Manufacturer recommendations.
- Pets and household dust.
- HVAC operating hours.
- Indoor air quality conditions.
Some common filters need monthly attention during heavy cooling use.
Others may last several months.
DIY-safe steps:
- Turn the thermostat’s system setting to OFF.
- Locate the accessible filter compartment.
- Check the filter size and airflow direction.
- Inspect the filter for visible dust buildup.
- Replace or clean it according to manufacturer instructions.
- Restore normal thermostat operation.
Never operate equipment without a required filter.
Also, don’t assume the highest-rated filter is automatically best.
Very restrictive filters can create airflow problems in systems not designed for them.
4. Keep Supply Vents and Return Grilles Clear
Typical cost: $0
Your AC needs adequate airflow to distribute cooled air.
Supply vents deliver conditioned air into rooms.
Return grilles allow indoor air to flow back toward the cooling equipment.
Furniture, rugs, curtains, and stored items can restrict these pathways.
Walk through your home and check that accessible supply vents and return grilles are unobstructed.
Avoid closing large numbers of supply vents in unused rooms unless your system was specifically designed for zoning.
Closing vents can increase duct pressure and interfere with normal airflow.
5. Use Ceiling Fans to Improve Comfort
Typical cost: $0 if already installed
Ceiling fans don’t lower the actual temperature of a room.
Instead, they move air across your skin, improving evaporative cooling and helping you feel more comfortable.
This may allow you to maintain a warmer thermostat setting.
For example, a household might find 77°F comfortable with a fan even though it previously preferred 75°F without one.
The energy benefit comes primarily from reducing AC demand, not from the fan itself.
Fans also consume electricity, so turn them off when rooms are unoccupied.
Check Fan Direction
Many ceiling fans have a reversible motor.
During summer, a downward airflow generally provides the most noticeable cooling effect.
On many fans, this corresponds to counterclockwise rotation when viewed from below.
Follow your fan manufacturer’s instructions because designs vary.
6. Close Blinds and Curtains During Peak Sunlight
Typical cost: $0–$150+
Windows can admit substantial solar heat.
Solar heat gain occurs when sunlight passes through glazing and warms indoor surfaces.
Rooms with large west-facing windows often become especially warm during late afternoons.
Closing blinds, curtains, or shades can reduce unwanted solar heat gain.
The Department of Energy recommends appropriate window coverings as part of managing home energy use.
Which Windows Should You Prioritize?
Start with windows receiving strong direct sunlight.
South-facing windows may receive substantial sunlight depending on season and shading.
West-facing windows often contribute to late-afternoon overheating.
Consider:
- Light-colored blinds.
- Insulated cellular shades.
- Exterior shading.
- Properly selected solar-control window films.
Window films can have compatibility limitations, especially with certain insulated glass units.
Check window and film manufacturer guidance before installation.
7. Seal Drafts Around Windows and Doors
Typical DIY materials cost: $10–$100
Air leaks allow outdoor air to enter your home.
During summer, that air may be hotter and more humid than the indoor air.
Your AC must remove the added heat and moisture.
Common leakage locations include:
- Exterior door edges.
- Window frames.
- Attic access openings.
- Plumbing penetrations.
- Gaps around building materials.
Weatherstripping and suitable caulk may help address accessible leaks.
Safe DIY Air-Sealing Steps
- Identify noticeable drafts around accessible windows and exterior doors.
- Inspect existing weatherstripping for damage.
- Replace worn removable weatherstripping.
- Use appropriate caulk for small, accessible gaps where permitted.
- Check that doors and windows still operate normally.
Don’t seal intentional ventilation openings, combustion-air supplies, or appliance exhaust pathways.
Major air-sealing work can affect ventilation and combustion safety, particularly in homes with fuel-burning equipment.
A professional energy assessment may be worthwhile before undertaking extensive sealing.
8. Improve Attic Insulation
Typical professional project cost: Varies widely
Your attic can be a major pathway for unwanted heat entering your home.
During summer, roof surfaces absorb solar energy and become hot.
Heat then moves toward the conditioned living space through the attic and ceiling.
Insulation helps slow that transfer.
Its effectiveness is described by R-value, a measure of resistance to heat flow.
Higher R-values generally indicate greater resistance, although installation quality also matters.
How Much Attic Insulation Do You Need?
The appropriate level depends on:
- Climate zone.
- Existing insulation.
- Attic construction.
- Local building requirements.
- Moisture and ventilation conditions.
The Department of Energy provides climate-specific insulation guidance.
Don’t assume every attic needs the same R-value.
Important Attic Safety Considerations
Attics can contain extreme heat, exposed wiring, fragile ceiling surfaces, and hazardous insulation materials.
Older homes may also contain materials requiring special evaluation before disturbance.
Don’t walk on ceiling drywall or disturb unknown insulation.
For extensive insulation work, hire a qualified insulation contractor.
Related guide: Home Insulation Guide: Where to Add Insulation First.
9. Reduce Heat From Cooking and Appliances
Typical cost: $0
Appliances create heat inside your home.
During summer, that heat adds to the workload of your air conditioner.
Ovens, stovetops, dryers, and some electronics can contribute to indoor heat gain.
You don’t need to stop using these appliances.
Instead, consider adjusting when and how you use them.
Practical options include:
- Cooking with a microwave when appropriate.
- Using an outdoor grill safely.
- Running dishwashers during cooler periods when practical.
- Avoiding unnecessary oven preheating.
- Turning off unused electronics.
- Using kitchen ventilation while cooking.
Exhaust fans remove indoor air, but they can also pull outdoor air into the home.
Use them when needed rather than continuously without a reason.
If your utility uses time-of-use electricity rates, shifting certain appliance loads may also reduce costs.
10. Schedule Regular AC Maintenance
Typical professional service cost: Approximately $100–$300, depending on scope and location
Routine AC maintenance can help identify developing problems before they become major repairs.
A qualified technician may inspect:
- Refrigerant system performance.
- Electrical connections.
- Airflow.
- Condensate drainage.
- Indoor and outdoor coils.
- Thermostat operation.
- System controls.
The condensate drain carries away water removed from indoor air during cooling.
Blocked drains can cause leaks or water damage.
Does AC Maintenance Lower Electricity Bills?
It can when maintenance corrects a problem affecting efficiency.
For example, cleaning a heavily fouled coil or restoring proper airflow may improve performance.
However, a system already operating correctly may show little measurable energy reduction after routine service.
Maintenance should also be viewed as a way to support reliability and identify safety concerns.
Refrigerant handling, electrical repairs, and internal equipment servicing belong to qualified HVAC professionals.
11. Keep the Outdoor AC Unit Unobstructed
Typical cost: $0–$30
Central air conditioners usually have an outdoor condenser unit.
This equipment releases heat removed from inside your home.
It requires adequate airflow.
Vegetation, debris, storage items, and poorly positioned decorative screens can restrict that airflow.
What Homeowners Can Safely Do
Keep nearby vegetation trimmed according to the manufacturer’s clearance requirements.
Remove loose leaves and debris around the unit without opening equipment.
Avoid placing objects on top of the condenser.
Don’t cover the unit while it’s operating.
If the coil needs cleaning or you notice damaged components, arrange professional maintenance.
Avoid pressure washing equipment or spraying water near electrical components unless the manufacturer specifically provides safe homeowner instructions.
12. Check Ductwork for Leakage Problems
Typical cost: Inspection and repair vary by home
In homes with central air conditioning, ducts distribute cooled air throughout the building.
Duct leakage can waste cooling energy, especially when ducts travel through hot attics, garages, or other unconditioned spaces.
According to the Department of Energy, duct systems can lose significant energy through leakage and poor insulation.
Potential warning signs include:
- Rooms that remain warmer than others.
- Weak airflow from multiple vents.
- Visible disconnected duct sections.
- Excessive dust near duct connections.
- High cooling demand despite reasonable thermostat settings.
Should You Seal Ducts Yourself?
Minor accessible sealing may be possible in some circumstances, but duct systems can be difficult to evaluate.
Don’t enter unsafe attic spaces or disturb potentially hazardous insulation.
Professional duct testing can help determine whether leakage is significant.
Qualified contractors may use mastic, an appropriate duct-sealing compound, or approved materials.
Ordinary cloth-backed duct tape is generally not a durable choice for permanent duct sealing.
13. Manage Indoor Humidity
Typical cost: $10–$30 for a basic hygrometer
Humidity strongly affects summer comfort.
Relative humidity measures the amount of moisture in air compared with the maximum amount it could hold at that temperature.
High humidity makes evaporation from your skin less effective.
That can make a room feel warmer than its thermostat reading suggests.
The Environmental Protection Agency generally recommends keeping indoor relative humidity below 60%, ideally between 30% and 50%.
Practical Humidity-Control Steps
Use bathroom exhaust fans during showers.
Operate kitchen ventilation when cooking produces substantial moisture.
Repair plumbing leaks promptly.
Avoid introducing unnecessary moisture indoors.
Keep windows closed when outdoor air is very humid and your AC is operating.
A dehumidifier may help in some homes, but it consumes electricity and releases heat into the space.
If humidity remains persistently high, have a qualified professional evaluate the cooling system and moisture sources.
14. Improve Window Shading Before Replacing Windows
Typical cost: $20–$500+ for smaller shading projects
Replacing windows can be expensive.
If your main concern is summer overheating, less costly shading improvements may provide meaningful comfort benefits.
Possible options include:
- Cellular shades.
- Exterior awnings.
- Solar screens.
- Exterior shutters.
- Appropriate window films.
Exterior shading can be especially effective because it intercepts sunlight before it passes through the glass.
When Are Replacement Windows Worth Considering?
Window replacement may be more relevant when existing windows are damaged, leaking, difficult to operate, or nearing the end of their useful life.
ENERGY STAR-certified windows can improve thermal performance compared with some older products.
However, energy savings alone may not quickly recover the full cost of replacing otherwise functional windows.
Compare installation quotes, window specifications, warranties, and expected comfort improvements.
For many households, air sealing and shading deserve consideration before a full window replacement project.
15. Consider a Higher-Efficiency AC or Heat Pump
Typical cost: Several thousand dollars or more, depending on equipment and installation
If your cooling system is aging, frequently breaking down, or unable to maintain comfort, replacement may be worth evaluating.
Modern central air conditioners and heat pumps are available in a range of efficiency levels.
A heat pump can provide both cooling and heating by transferring heat between indoors and outdoors.
During summer, it operates similarly to a conventional air conditioner.
Higher-efficiency equipment may use less electricity to provide the same amount of cooling.
However, installation quality, equipment sizing, duct performance, and climate all influence actual savings.
Don’t Replace a Working AC Based on Age Alone
Consider:
- Current equipment condition.
- Frequency and cost of repairs.
- Existing efficiency rating.
- Local electricity prices.
- Expected years of ownership.
- Contractor recommendations.
- Installation cost.
- Available utility or state rebates.
Request multiple written estimates.
Ask contractors to explain how they determined the appropriate system capacity.
An oversized AC can have comfort and humidity-control disadvantages, while an undersized system may struggle during peak conditions.
Before purchasing, review our related guide: Heat Pump vs. Central AC: Costs and Efficiency.
Which AC Efficiency Fixes Should You Try First?
Not every improvement has the same cost, difficulty, or likely benefit.
The table below helps prioritize actions.
Savings potential is qualitative because actual results depend on your home and existing problems.
AC Efficiency Checklist
| Improvement | Typical cost | DIY-friendly? | Potential benefit | Priority |
|---|---|---|---|---|
| Raise thermostat setting | $0 | Yes | Lower cooling demand | High |
| Use thermostat scheduling | $0–$250+ | Usually | Less cooling while away | High |
| Check AC filter | $5–$40 | Usually | Better airflow when filter is dirty | High |
| Clear blocked vents | $0 | Yes | Improved air distribution | High |
| Use existing ceiling fans | Low operating cost | Yes | Better perceived comfort | High |
| Close sun-facing blinds | $0 | Yes | Reduced solar heat gain | High |
| Weatherstrip accessible leaks | $10–$100 | Usually | Reduced unwanted airflow | Medium |
| Professional AC maintenance | $100–$300 | No | Identifies performance problems | Medium |
| Improve attic insulation | Project-dependent | Professional often preferred | Reduced heat transfer | Medium |
| Professional duct sealing | Project-dependent | Professional preferred | Reduced distribution losses | Medium |
| Add exterior shading | $50–$500+ | Depends | Reduced window heat gain | Medium |
| Replace AC equipment | Several thousand dollars+ | No | Potentially improved efficiency | Situational |
These are illustrative cost ranges rather than contractor quotes or verified current national averages.
A Practical Order of Operations
Start with free adjustments.
Use your thermostat effectively, manage sunlight, and keep vents unobstructed.
Next, handle inexpensive maintenance items such as filters and accessible weatherstripping.
If your electricity use remains unexpectedly high, investigate equipment performance, duct leakage, and insulation.
Consider major equipment replacement after understanding whether the existing system is functioning properly.
This approach helps avoid spending thousands of dollars on equipment when a smaller problem may be responsible for poor performance.
Realistic Costs & Savings
A useful way to estimate cooling savings is to calculate how much electricity your AC uses and multiply potential reductions by your electricity rate.
The key is separating cooling costs from the rest of your household electricity bill.
Your bill also includes lighting, refrigeration, water heating, electronics, and other appliances.
Reducing AC consumption by 10% does not mean your entire electricity bill falls by 10%.
Worked Example: A 2,000-Square-Foot Home
Consider a hypothetical detached home with these assumptions:
| Factor | Assumption |
|---|---|
| Home size | 2,000 sq ft |
| Climate | Mixed US climate |
| Electricity rate | $0.17/kWh |
| Cooling season | 5 months |
| Average monthly AC use | 600 kWh |
| Seasonal AC electricity use | 3,000 kWh |
| Illustrative efficiency improvement | 5%–15% |
These numbers are examples for calculation purposes, not national averages.
A 15% reduction may require correcting a substantial existing inefficiency or combining multiple improvements. It should not be assumed achievable through thermostat adjustments alone.
Step 1: Calculate Current Cooling Cost
Formula:
Cooling cost = AC electricity consumption × Electricity rate
Using our assumptions:
3,000 kWh × $0.17/kWh = $510 per cooling season
Step 2: Calculate Potential Savings
Suppose the household reduces cooling electricity use by 5%.
3,000 kWh × 0.05 = 150 kWh
150 kWh × $0.17 = $25.50
At a hypothetical 10% reduction:
3,000 kWh × 0.10 = 300 kWh
300 kWh × $0.17 = $51
At a hypothetical 15% reduction:
3,000 kWh × 0.15 = 450 kWh
450 kWh × $0.17 = $76.50
Under these assumptions, the illustrative seasonal savings range is approximately $26–$77.
Actual results may fall outside that range.
How Electricity Rates Change the Math
The same electricity savings are worth different amounts depending on the local rate.
| Electricity saved | $0.12/kWh | $0.17/kWh | $0.25/kWh | $0.35/kWh |
|---|---|---|---|---|
| 100 kWh | $12 | $17 | $25 | $35 |
| 250 kWh | $30 | $42.50 | $62.50 | $87.50 |
| 500 kWh | $60 | $85 | $125 | $175 |
| 1,000 kWh | $120 | $170 | $250 | $350 |
These figures represent electricity charges calculated at constant rates.
Actual bills may include fixed charges, tiered pricing, demand charges, or time-of-use pricing.
How to Find Your Electricity Rate
Look at your utility bill for the electricity price per kWh.
Some bills separate supply and delivery charges.
When estimating savings, include the charges that change when consumption changes.
For a simple flat-rate bill:
Estimated variable electricity rate = Applicable usage-based charges ÷ kWh consumed
For example:
$204 in usage-based charges ÷ 1,200 kWh = $0.17/kWh
Don’t automatically include fixed monthly service charges in the rate used for calculating savings.
If your utility uses tiered or time-of-use pricing, the value of saving one kWh depends on when that electricity would have been consumed.
How to Estimate AC Usage
The most accurate option is dedicated equipment monitoring.
However, many households don’t have that.
Alternatives include:
- Utility hourly or daily electricity data.
- Smart thermostat runtime reports.
- Comparing similar-weather periods.
- Professional energy monitoring.
- Reviewing historical summer and winter electricity use.
Subtracting winter electricity consumption from summer consumption can provide a rough estimate in some all-electric homes, but it isn’t precise.
Other seasonal loads may differ, including heating, water heating, pools, and household occupancy.
Do Savings From Multiple Fixes Add Together?
Not necessarily.
Suppose thermostat adjustments reduce cooling demand.
Adding insulation afterward may still help, but its savings will be calculated against a home that already uses less cooling energy.
Similarly, sealing leaks and upgrading AC equipment can address overlapping energy losses.
Avoid simply adding every advertised percentage together.
A whole-home energy assessment can help estimate the combined effect of multiple improvements.
Why Your AC Runs Constantly (And How to Fix It)
An AC running constantly during extreme heat isn’t automatically malfunctioning.
Many systems operate for long periods when outdoor temperatures approach the conditions used to size the equipment.
Variable-capacity systems may also run continuously at reduced output to maintain comfort.
However, constant operation accompanied by poor cooling, high humidity, or unusual noises can indicate a problem.
Common Causes of Long AC Runtimes
1. Extreme outdoor temperatures
Your AC must remove heat entering through the home’s exterior.
Hotter conditions increase cooling demand.
2. Dirty air filters
Restricted airflow may reduce cooling performance.
3. Air leaks and insufficient insulation
Heat enters more quickly when the building envelope performs poorly.
4. Dirty coils
Dirty indoor or outdoor coils can interfere with heat transfer.
5. Duct leakage
Conditioned air may escape before reaching occupied rooms.
6. Refrigerant system problems
Incorrect refrigerant charge or leaks can reduce performance and damage equipment.
Refrigerant diagnosis and handling require qualified HVAC professionals.
7. Equipment sizing or installation issues
Improperly sized or installed equipment may struggle to maintain comfort.
How to Check Your AC Before Calling for Service
You can safely perform several basic checks.
- Confirm the thermostat is set to COOL.
- Check that the requested temperature is reasonable.
- Inspect the accessible air filter.
- Make sure supply and return vents aren’t blocked.
- Check for obvious obstructions around the outdoor unit.
- Observe whether the system is maintaining the thermostat setting.
- Record unusual noises, odors, or operating behavior.
Don’t open electrical compartments, handle refrigerant lines, or attempt internal repairs.
If cooling performance remains poor, contact a qualified HVAC technician.
What Temperature Difference Should You Expect?
Homeowners sometimes hear that supply air should always be a specific number of degrees cooler than return air.
In practice, the appropriate temperature difference depends on airflow, humidity, equipment design, and operating conditions.
A single vent temperature reading isn’t enough to diagnose system performance.
Technicians use multiple measurements to evaluate cooling output and system condition.
SEER2 Explained: Is a More Efficient AC Worth It?
SEER2 stands for Seasonal Energy Efficiency Ratio 2.
It measures the seasonal cooling efficiency of air conditioners and heat pumps under standardized testing procedures.
A higher SEER2 rating generally indicates that equipment can deliver more cooling per unit of electricity under the test conditions.
SEER2 replaced the earlier SEER rating under updated federal testing requirements.
Because the testing procedures differ, SEER and SEER2 values shouldn’t be treated as directly interchangeable.
SEER2 Comparison Example
Suppose two properly installed systems provide the same seasonal cooling output.
One has a SEER2 rating of 14.
The other has a SEER2 rating of 18.
Under simplified comparable conditions, the relative electricity use can be approximated as:
New electricity use ÷ Old electricity use = Old SEER2 ÷ New SEER2
14 ÷ 18 = 0.778
That suggests the higher-rated system could use approximately 22% less electricity for equivalent cooling output under the assumed comparison.
This is a rating-based illustration, not a prediction of actual household savings.
Real-world results depend on climate, installation, system capacity, ductwork, and operating conditions.
Example Equipment Comparison
| Factor | Lower-efficiency system | Higher-efficiency system |
|---|---|---|
| Illustrative SEER2 | 14 | 18 |
| Relative rated cooling efficiency | Lower | Higher |
| Equipment cost | Often lower | Often higher |
| Controls | Vary by model | Vary by model |
| Actual savings | Depends on installation and usage | Depends on installation and usage |
Should You Replace Your AC Just for Better SEER2?
Usually, the decision requires more than comparing efficiency ratings.
Consider the total installed price difference and expected annual electricity savings.
Suppose a higher-efficiency option costs $2,000 more and is estimated to save $100 annually.
Simple incremental payback:
$2,000 ÷ $100 = 20 years
This doesn’t include maintenance differences, future energy prices, financing costs, or equipment replacement timing.
If your current equipment is functioning well, replacing it solely for efficiency may offer a relatively long payback.
If replacement is already necessary, comparing efficiency levels is more useful because you’re evaluating the additional cost of a higher-efficiency model rather than the entire replacement expense.
What About Heat Pumps?
A modern heat pump can cool your home while also providing heating.
Its cooling efficiency is measured using SEER2.
Heating efficiency is commonly expressed as HSPF2, or Heating Seasonal Performance Factor 2.
Some heat-pump performance discussions also use COP, or coefficient of performance.
COP compares the amount of heating or cooling delivered with the energy consumed under specified conditions.
A heat pump’s efficiency changes with operating conditions, particularly during heating.
Ask contractors to explain both cooling and heating performance when comparing heat pumps.
Cooling Strategies for Different US Climates
The most effective cooling strategy depends on local weather.
A home in coastal Florida faces different conditions than one in Phoenix or Seattle.
Hot, Humid South
In Florida, Louisiana, Mississippi, and other humid regions, moisture control is essential.
An air conditioner removes humidity as well as heat.
Extremely high thermostat settings during extended absences may allow indoor humidity to rise.
Monitor humidity with a hygrometer.
Aim to keep indoor relative humidity below 60%, ideally within the EPA’s recommended 30%–50% range when practical.
If moisture remains excessive, investigate ventilation, drainage, air leaks, and HVAC performance.
Hot, Dry Southwest
Arizona, Nevada, and parts of inland California experience intense solar heat.
Exterior shading, reflective window coverings, and attic improvements may be particularly useful.
Some dry-climate homes use evaporative coolers.
An evaporative cooler lowers air temperature through water evaporation.
These systems perform best under relatively dry outdoor conditions and require appropriate ventilation.
They should not be operated using the same assumptions as sealed-home refrigerated air conditioning.
Mixed Midwest and Mid-Atlantic Climates
Homes in states such as Missouri, Pennsylvania, Ohio, and Virginia often need substantial cooling during summer and heating during winter.
Improvements such as air sealing, attic insulation, and duct repairs can provide benefits in both seasons.
Consider year-round comfort when evaluating larger projects.
Cooler Northern Regions
In northern states, cooling seasons may be shorter.
That can make expensive cooling-only upgrades harder to justify through electricity savings alone.
Low-cost measures such as fans, window shading, and thermostat scheduling may be especially attractive.
However, heat waves can still create dangerous indoor conditions.
Maintain safe temperatures rather than relying exclusively on naturally cool weather.
Coastal Areas With Mild Evenings
Some coastal locations experience cool nights even during summer.
When outdoor air is cooler, sufficiently dry, and healthy to breathe, natural ventilation may help reduce mechanical cooling.
Check outdoor air quality before opening windows, particularly during wildfire smoke events.
Avoid opening windows when doing so creates security concerns or introduces excessive humidity.
How Renters Can Reduce Cooling Costs
Renters often have limited control over AC equipment, insulation, and permanent building improvements.
However, several strategies require little money and no structural changes.
Low-Cost Renter-Friendly Options
Consider:
- Adjusting thermostat settings when permitted.
- Using plug-in or existing ceiling fans.
- Installing removable curtains or shades.
- Closing blinds during peak sunlight.
- Keeping furniture away from vents.
- Checking accessible HVAC filters.
- Using a plug-in hygrometer.
- Reducing unnecessary indoor heat from appliances.
Ask your landlord before modifying thermostats, installing window films, or changing building components.
Some leases specify which maintenance tasks tenants may perform.
What If Your Apartment Has Window AC Units?
Window air conditioners are common in rentals.
Their efficiency and electricity use depend on equipment condition, size, installation, and usage.
Check the filter regularly according to manufacturer instructions.
Make sure accessible airflow openings aren’t blocked.
Inspect the surrounding installation for obvious gaps, but don’t modify structural supports or electrical connections.
Improperly installed window units can fall or allow water intrusion.
If the unit is unstable, leaking, or damaged, contact property management or a qualified installer.
Should Renters Buy a Portable AC?
Portable air conditioners can be useful when permanent installation isn’t possible.
However, performance varies.
Single-hose portable units can create negative indoor pressure, drawing replacement air into the home through leaks.
Dual-hose designs can reduce some of those issues, although actual performance depends on the product.
When comparing portable ACs, review their DOE cooling capacity ratings, installation requirements, noise levels, condensate management, and electricity consumption.
Choose equipment appropriately sized for the room rather than assuming a larger unit is always better.
When to Call a Professional
Many cooling improvements are straightforward, but HVAC systems contain electrical components, pressurized refrigerant, and moving parts.
Qualified service is appropriate when equipment performance or safety is uncertain.
Contact an HVAC Technician If:
- Your AC cannot maintain a reasonable thermostat setting.
- Cooling performance suddenly drops.
- The system repeatedly starts and stops after very short intervals.
- You see ice on refrigerant lines or indoor coils.
- Condensate water leaks into living areas.
- The outdoor unit makes unusual noises.
- Indoor humidity remains persistently high.
- The system has recurring electrical or control problems.
- Different rooms have severe comfort differences.
- Energy consumption rises unexpectedly without a clear weather-related explanation.
A licensed HVAC technician can evaluate airflow, refrigerant system performance, controls, and mechanical components.
Hire a licensed electrician for electrical wiring or circuit concerns.
Safety Issues Beyond Air Conditioning
If your home also has fuel-burning appliances, maintain carbon monoxide alarms according to manufacturer instructions and local requirements.
Carbon monoxide is an odorless, colorless gas that can be produced by malfunctioning combustion equipment.
An air conditioner does not normally produce carbon monoxide, but a combined HVAC system may share equipment locations or ductwork with fuel-burning heating appliances.
Never block combustion-air openings or exhaust vents while sealing drafts.
When to Consider a Home Energy Audit
A professional home energy assessment may be useful when:
- Cooling bills remain high despite basic improvements.
- Rooms have large temperature differences.
- Your home has significant drafts.
- Attic insulation appears inadequate.
- You’re considering major HVAC replacement.
- You want to prioritize several possible upgrades.
Some utilities offer discounted energy assessments.
Check current local availability and program requirements.
Common Mistakes to Avoid
These common habits can undermine otherwise sensible cooling improvements.
1. Setting the AC Extremely Low to Cool Faster
A conventional single-stage air conditioner generally doesn’t cool faster because you set the thermostat to 60°F instead of 75°F.
It may simply run longer than necessary.
2. Closing Vents in Unused Rooms
Closing many supply vents can increase duct pressure and interfere with airflow.
Unless your HVAC system is designed for zoning, keep vents operating according to the equipment’s requirements.
3. Ignoring Dirty Filters
A clogged filter may contribute to poor airflow and cooling performance.
Check filters according to manufacturer guidance.
4. Leaving Fans Running in Empty Rooms
Fans improve perceived comfort for occupants.
They don’t lower the actual room temperature, so running them in empty rooms generally wastes electricity.
5. Blocking the Outdoor Condenser
Storage items, landscaping, or decorative covers can restrict airflow.
Follow manufacturer clearance requirements.
6. Assuming Every AC Upgrade Pays for Itself Quickly
Higher-efficiency equipment can reduce operating costs, but installation expenses may be substantial.
Compare realistic savings with the incremental cost.
7. Ignoring Humidity
A thermostat reading alone doesn’t describe indoor comfort.
Persistent high humidity can also contribute to moisture problems.
8. Adding Advertised Savings Percentages Together
Multiple improvements often address overlapping energy losses.
A 10% savings estimate from one improvement and a 15% estimate from another don’t necessarily produce a combined 25% reduction.
FAQ
1. What is the fastest way to lower my AC bill?
Start by raising your thermostat setting slightly, closing blinds on sun-facing windows, and checking your AC filter. These changes are inexpensive and can be implemented quickly. Use fans in occupied rooms to improve comfort at warmer settings. Actual savings depend on your current habits, home construction, and outdoor weather.
2. What temperature should I set my AC to save money?
For many households, approximately 78°F is a useful starting point when cooling is needed. However, comfort and health needs vary. If 78°F feels too warm, try 75°F–77°F. Setting the temperature higher while away may reduce consumption, provided indoor humidity and other conditions remain appropriate.
3. Why is my AC bill so high even at 78°F?
Possible reasons include extreme outdoor heat, high humidity, poor insulation, air leakage, duct losses, or inefficient equipment. Electricity rates may also be higher than in previous years. Review your electricity consumption rather than only the bill total, and check whether your system is maintaining the requested temperature.
4. Is it cheaper to leave the AC on all day or turn it off?
For many conventional systems, raising the cooling setpoint while away can reduce electricity consumption compared with maintaining a lower occupied temperature all day. Completely turning cooling off isn’t always appropriate, especially in humid climates or homes with sensitive occupants. Consider a moderate setback and monitor indoor conditions.
5. Does changing the AC filter lower electricity costs?
Replacing a dirty filter can improve airflow and help restore cooling performance. The financial benefit depends on how restricted the old filter was and how the system responds. Replacing an already-clean filter won’t necessarily produce measurable savings. Follow equipment instructions and use compatible filters.
6. Can ceiling fans help reduce air conditioning costs?
Yes, indirectly. Ceiling fans move air across your skin, making warmer indoor temperatures feel more comfortable. If this allows you to raise the thermostat, your AC may use less electricity. The fans themselves consume energy, so turn them off when rooms are empty.
7. Why does my AC run constantly during summer?
Long operation can be normal during very hot weather, particularly for variable-capacity systems designed to run at reduced output. However, dirty filters, insufficient insulation, duct leakage, equipment problems, and poor airflow can also contribute. If your AC cannot maintain the thermostat setting, schedule professional service.
8. Is a higher SEER2 air conditioner worth the extra money?
A higher SEER2 rating generally indicates better standardized cooling efficiency, but the financial value depends on the installed price difference, cooling demand, electricity rates, and equipment life. Compare multiple contractor quotes and realistic operating-cost estimates. A higher-efficiency model isn’t automatically the best value for every home.
9. How much electricity does central AC use per month?
Consumption varies widely based on equipment capacity, efficiency, climate, home size, and runtime. For illustration, a system averaging 3 kW of electrical demand for six hours daily would use about 540 kWh over 30 days. At $0.17/kWh, that equals approximately $91.80 in usage-based electricity charges.
10. Does closing curtains actually help lower AC costs?
Closing curtains or blinds on windows receiving direct sunlight can reduce solar heat gain. The effect depends on window orientation, glazing, shade design, and outdoor conditions. Exterior shading can be particularly effective because it blocks sunlight before it enters the home. Savings will vary, but improved comfort may be noticeable.
11. Should I repair my old AC or replace it?
Consider the repair cost, equipment condition, efficiency, warranty status, and expected remaining service life. A relatively inexpensive repair may make sense for an otherwise reliable system. Repeated expensive repairs may justify replacement estimates. Ask qualified contractors to explain both options rather than assuming replacement is necessary.
12. Can I lower my AC bill without buying anything?
Yes. Free strategies include adjusting thermostat settings, using existing fans only when rooms are occupied, closing blinds during strong sunlight, keeping vents unobstructed, and reducing unnecessary indoor heat from appliances. These changes may lower cooling demand, although results depend on your home and current practices.
Final AC Savings Checklist
Learning how to lower AC bill costs starts with understanding why your home needs cooling and which changes address that demand.
For most households, the most practical approach is to begin with inexpensive improvements, evaluate comfort, and use energy data to determine whether larger investments make sense.
Pingback: Heat Pump vs Furnace: Costs, Efficiency, and Which Is Right for Your Home – Energy Savings Perlon
Pingback: Ductless Mini-Split Guide: Costs, Pros, Cons, and Energy Savings – Energy Savings Perlon
Pingback: Heat Pump Cost Guide: Installation Prices, Running Costs, and Payback – Energy Savings Perlon
Pingback: What Uses the Most Electricity in Your Home? (Appliance kWh Chart) – Energy Savings Perlon