Finding the best thermostat setting can help you manage heating and cooling costs without making your home uncomfortable. But the right temperature depends on more than the season.
Your climate, insulation, HVAC equipment, daily schedule, and personal comfort all influence how efficiently your home maintains its temperature.
Read Also: HVAC Efficiency Guide: How to Cut Heating and Cooling Costs
For example, setting your thermostat to 78°F in summer may reduce air-conditioning expenses compared with 72°F. In winter, lowering your heating temperature while you’re asleep or away can produce savings.
However, these recommendations aren’t universal. Heat pumps, humid climates, and homes with poor insulation may require different approaches.
This guide explains practical summer and winter thermostat settings, how programmable and smart thermostats work, what thermostat setbacks can realistically save, and how to build a schedule that fits your household.
You’ll also learn when adjusting your thermostat helps—and when an underlying HVAC problem deserves attention.
Quick Takeaways
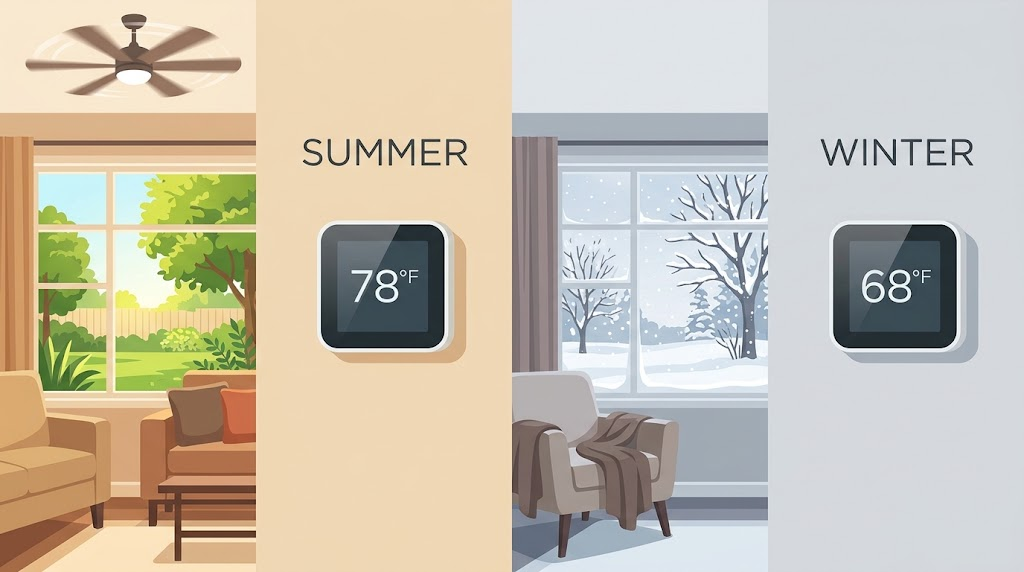
- Summer: Start around 78°F when you’re home and need cooling, then adjust for comfort.
- Winter: Start around 68°F–70°F while awake and home, then experiment with lower temperatures when appropriate.
- Away from home: Conventional HVAC systems can often use larger temperature setbacks during extended absences.
- Heat pumps: Avoid aggressive winter setbacks unless your equipment and controls support them efficiently.
- Potential savings: The U.S. Department of Energy estimates that certain thermostat setbacks can save up to 10% annually on heating and cooling.
- Smart thermostats: Scheduling, remote control, and occupancy features may make efficient settings easier to maintain.
- Humidity matters: Summer comfort depends on indoor moisture as well as temperature.
- Equipment condition: Dirty filters, air leaks, and HVAC problems can limit the benefits of thermostat adjustments.
What Is the Best Thermostat Setting?
The best thermostat setting is the temperature that balances comfort, energy consumption, indoor humidity, and your household’s needs.
Read Also: How to Lower Your Electric Bill: 35 Proven Ways (Room-by-Room Checklist)
There isn’t one temperature that works for every American home.
A well-insulated house in Colorado may remain comfortable at different settings than an older house in humid Florida.
Similarly, an apartment surrounded by other conditioned units may require less heating and cooling than a detached house of the same size.
Recommended Thermostat Temperatures at a Glance
The following temperatures are practical starting points, not strict requirements.
| Situation | Suggested setting | Important considerations |
|---|---|---|
| Summer, home and awake | 75°F–78°F | Adjust for humidity and comfort |
| Summer, sleeping | 74°F–78°F | Bedrooms may need cooler temperatures |
| Summer, away | 80°F–85°F | Control humidity and protect sensitive belongings |
| Winter, home and awake | 68°F–70°F | Individual comfort varies |
| Winter, sleeping | 60°F–67°F | Consider health needs and bedroom conditions |
| Winter, away | 55°F–65°F | Protect plumbing and account for building conditions |
| Extended winter vacation | Often 55°F–60°F minimum | Colder climates or vulnerable plumbing may require higher settings |
These ranges are general household guidance. They are not all official DOE recommendations, and some homes will need different temperatures.
The Department of Energy commonly recommends starting around 68°F–70°F during winter waking hours and setting the thermostat as high as comfortably possible during summer.
Why a Few Degrees Can Matter
Your heating or cooling system works to offset heat moving between your home and the outdoors.
During winter, heat naturally escapes from warmer indoor spaces.
During summer, outdoor heat enters through windows, walls, ceilings, air leaks, and other surfaces.
The larger the indoor-outdoor temperature difference, the faster heat generally moves through the building envelope.
Your building envelope consists of the walls, roof, windows, doors, floors, and other materials separating conditioned indoor space from the outdoors.
Reducing that temperature difference can reduce the amount of heating or cooling your equipment must provide.
However, the actual savings depend on the HVAC system, weather, insulation, and how long you maintain the adjusted temperature.
Best Thermostat Setting for Summer
For many homes, 78°F is a useful starting point for summer cooling when people are home.
That doesn’t mean everyone will feel comfortable at 78°F.
Humidity, air movement, clothing, sunlight, and personal preferences all influence how warm a room feels.
If 78°F is uncomfortable, try 76°F or 77°F and make smaller adjustments.
Read Also: How to Read Your Electric Bill: kWh, Delivery Charges, and Rates Explained
Summer Thermostat Settings by Situation
| Household situation | Suggested temperature |
|---|---|
| Home during the day | 76°F–78°F |
| Working from home | 74°F–78°F |
| Sleeping | 74°F–78°F |
| Away for several hours | 80°F–85°F |
| Away for several days | Climate- and humidity-dependent |
These temperatures are examples for homes using air conditioning.
The best choice depends partly on how quickly your house heats up and how effectively your AC removes moisture.
Is 78°F Too Hot for Summer?
For some households, yes.
People who are sensitive to heat, have certain health conditions, or live in humid environments may need cooler indoor temperatures.
According to the Environmental Protection Agency, controlling indoor moisture is important for reducing mold-related problems.
The EPA generally recommends keeping indoor relative humidity below 60%, ideally between 30% and 50%.
Relative humidity describes how much moisture the air contains compared with the maximum it could hold at that temperature.
A home at 78°F with high humidity may feel noticeably less comfortable than a home at the same temperature with lower humidity.
How to Stay Comfortable Without Lowering the AC
Several small changes can help.
- Use ceiling fans when rooms are occupied.
- Close blinds or curtains on sun-facing windows.
- Avoid running ovens during the hottest part of the day.
- Use bathroom exhaust fans while showering.
- Keep exterior doors and windows closed when AC is operating.
- Check indoor humidity with an inexpensive hygrometer.
A hygrometer measures humidity.
Ceiling fans don’t actually lower room temperature. They move air across your skin, helping you feel cooler.
Turn them off when leaving the room to avoid unnecessary electricity use.
What About Setting the AC to 85°F While Away?
An 85°F setting may be reasonable for some homes during short absences.
However, it can be unsuitable in humid climates, for heat-sensitive occupants or pets, or where indoor temperatures could damage belongings.
In hot, humid regions, allowing indoor humidity to rise too high can create moisture problems.
For longer absences, monitor indoor humidity and consider the recommendations of your HVAC manufacturer.
Best Thermostat Setting for Winter
For many households, the best thermostat setting for winter starts around 68°F–70°F during waking hours.
The Department of Energy recommends approximately this range as a starting point for winter comfort and efficiency.
You can experiment with lower temperatures if everyone in your household remains comfortable.
Recommended Winter Settings
| Situation | Suggested temperature |
|---|---|
| Home and awake | 68°F–70°F |
| Working at a desk | 68°F–72°F |
| Sleeping | 60°F–67°F |
| Away for work | 60°F–65°F |
| Extended absence | Usually at least 55°F–60°F, depending on the property |
These are starting ranges rather than guarantees of safety or comfort.
Older adults, infants, people with certain medical conditions, and others sensitive to cold may need warmer temperatures.
Also, thermostat readings don’t always match temperatures in bedrooms, bathrooms, or rooms near exterior walls.
Should You Lower the Heat at Night?
For many homes with conventional heating systems, lowering the thermostat overnight can save energy.
Suppose you normally maintain 70°F.
Reducing the setting to 64°F for eight hours decreases the indoor-outdoor temperature difference during much of that period.
Your heating system generally loses less heat to the outdoors while the home is cooler.
When the thermostat returns to 70°F, the system must warm the house again.
However, that recovery does not automatically erase the energy saved during the setback.
Why Heat Pumps Are Different
A heat pump transfers heat rather than producing it entirely through electrical resistance or combustion.
During winter, it extracts heat from outdoor air and moves that heat indoors.
Many heat pumps include auxiliary heat, often electric resistance heating, to provide additional warmth when needed.
Large thermostat increases can sometimes trigger auxiliary heat, particularly on older systems or systems with unsuitable controls.
Because resistance heating can use substantially more electricity than normal heat-pump operation, aggressive setbacks may reduce savings.
The DOE advises that setback strategies for heat pumps require special consideration.
A heat-pump-compatible thermostat can help manage recovery more efficiently.
For many heat-pump households, maintaining a relatively steady winter temperature is a sensible starting strategy.
How Thermostat Settings Affect Energy Bills
Understanding how thermostats work makes it easier to avoid common energy-saving mistakes.
A thermostat measures indoor temperature and communicates with your heating or cooling equipment.
For example, if your cooling thermostat is set to 76°F and the room becomes warmer than the control’s operating threshold, the system starts cooling.
Once the temperature reaches the appropriate threshold, the thermostat stops calling for cooling.
Most systems allow a small temperature difference between starting and stopping. This prevents equipment from switching on and off continuously.
Does Setting the Thermostat Lower Cool Your House Faster?
Usually, no.
Suppose your home is 82°F and you want it to reach 76°F.
Setting the thermostat to 65°F generally won’t make a conventional single-stage air conditioner cool faster.
It simply tells the equipment to continue operating until a much lower temperature is reached.
Some variable-capacity systems may respond differently, but extreme settings are still unnecessary.
A variable-capacity HVAC system can adjust its heating or cooling output rather than operating only at full capacity.
What Is a Thermostat Setback?
A thermostat setback is a temporary change to your normal indoor temperature.
During winter, it usually means lowering the heating setting.
During summer, the equivalent strategy involves raising the cooling setting.
According to the Department of Energy’s thermostat guidance, homeowners may save as much as 10% annually on heating and cooling by adjusting the thermostat 7°F–10°F for eight hours per day.
This is an estimate, not a universal outcome.
Savings vary with climate, equipment type, home construction, and household behavior.
Thermostat Setback Savings: What Actually Matters?
Three factors are especially important:
- How many degrees you adjust the thermostat.
- How long the adjusted setting remains active.
- How efficiently your equipment recovers afterward.
A four-hour setback generally offers a smaller opportunity than an eight-hour setback under otherwise similar conditions.
However, extreme setbacks can create comfort problems and may be inefficient for certain heat pumps.
The objective isn’t the biggest possible temperature change.
It’s finding a repeatable setting that reduces unnecessary heating and cooling without creating new problems.
Best Thermostat Setting When Away or Sleeping
Your thermostat setting when away should reflect how long the home will be empty, the outdoor weather, and your HVAC equipment.
A short trip to the grocery store rarely requires a major adjustment.
A full workday away from home presents more opportunity.
Summer Away Settings
For conventional central AC systems, consider raising the thermostat a few degrees while you’re away.
For example:
- Home: 77°F
- Away: 82°F
- Return: 77°F
This five-degree adjustment reduces cooling demand while the home is unoccupied.
However, don’t automatically use an aggressive setback if your home experiences high humidity.
Winter Away Settings
For conventional furnaces, a schedule might look like:
- Home: 69°F
- Away: 62°F
- Return: 69°F
This can reduce heat loss during the day.
With heat pumps, smaller changes or a consistent temperature may be preferable.
What Temperature Should You Use While Sleeping?
Sleep comfort is highly individual.
Some people prefer bedrooms in the low-to-mid 60s during winter, while others need warmer conditions.
In summer, many households prefer cooler sleeping temperatures than daytime settings.
If cooling the whole house overnight is expensive, consider:
- Using a ceiling fan.
- Closing blinds before sunset.
- Improving bedroom airflow.
- Using breathable bedding.
- Checking whether the bedroom receives adequate conditioned air.
Avoid closing large numbers of HVAC supply vents without professional guidance. Doing so can interfere with airflow and system performance.
Extended Vacations Require Extra Planning
Before leaving for several days, consider plumbing, moisture, pets, plants, and sensitive belongings.
In freezing weather, maintaining at least 55°F is a common minimum recommendation, but it does not guarantee that pipes won’t freeze.
Pipes inside exterior walls, crawl spaces, garages, and poorly insulated areas may freeze even when the thermostat reads 55°F.
In summer, keeping the home excessively warm can allow humidity to rise.
For extended absences, follow your property manager’s requirements and seek local professional advice when freeze or moisture risks are significant.
How to Create an Efficient Thermostat Schedule
A thermostat schedule automatically changes indoor temperature based on your daily routine.
This reduces the need to remember adjustments before work or bedtime.
Start with a simple schedule rather than programming numerous temperature changes.
Step-by-Step: Set Up Your Thermostat Safely
These steps involve ordinary thermostat controls only. They don’t require opening electrical equipment or changing wiring.
Step 1: Identify your HVAC system.
Determine whether you have a conventional furnace and air conditioner, a heat pump, or another heating system.
If you’re unsure, check your equipment documentation or ask your HVAC service provider.
Step 2: Choose comfortable occupied temperatures.
Start around 68°F–70°F for winter heating and 76°F–78°F for summer cooling.
Adjust based on comfort and household needs.
Step 3: Identify predictable away periods.
Look for times when nobody is home for several hours.
These periods may offer opportunities to reduce heating or cooling demand.
Step 4: Set reasonable setback temperatures.
For conventional systems, experiment with modest changes.
Avoid large winter setbacks on heat pumps unless your thermostat and equipment support them efficiently.
Step 5: Program recovery times.
If you return home at 6 p.m., consider whether your thermostat needs to begin restoring the occupied temperature earlier.
Some smart thermostats calculate this automatically.
Step 6: Monitor comfort and energy use.
Try the schedule for one or two weeks.
Compare indoor comfort, HVAC operation, and energy consumption.
Step 7: Make small adjustments.
Change settings by 1°F–2°F at a time rather than making extreme changes.
Example Weekday Thermostat Schedule
| Time | Summer cooling | Winter heating |
|---|---|---|
| 6 a.m. | 76°F | 69°F |
| 8 a.m. | 82°F | 62°F |
| 5 p.m. | 76°F | 69°F |
| 10 p.m. | 75°F | 65°F |
This is an illustrative schedule for a conventional heating and cooling system.
It assumes the home is empty during working hours.
Households with heat pumps, pets, medical temperature requirements, or humidity concerns should modify it.
A consistent schedule is often more useful than a complicated one that frequently needs manual overrides.
Smart Thermostats vs. Programmable Thermostats
You don’t need an expensive thermostat to improve HVAC efficiency.
A basic programmable thermostat may be enough if your daily routine is predictable.
Smart thermostats add convenience features that can make efficient operation easier.
Thermostat Comparison Table
| Feature | Manual thermostat | Programmable thermostat | Smart thermostat |
|---|---|---|---|
| Typical equipment price | $20–$60 | $25–$100 | $80–$250+ |
| Automatic schedules | No | Yes | Yes |
| Smartphone control | No | Usually no | Usually yes |
| Occupancy detection | No | Usually no | Available on some models |
| Energy reports | No | Limited | Available on some models |
| Internet required | No | No | Often needed for remote features |
| Best suited for | Simple temperature control | Predictable schedules | Flexible schedules and remote management |
Prices are illustrative retail ranges, not live quotes. Installation, compatibility, and features can change the total cost.
Are Smart Thermostats Worth It?
A smart thermostat may be useful when:
- Household schedules change frequently.
- You regularly forget to adjust temperatures.
- You want remote control while traveling.
- Your utility offers a thermostat rebate.
- You want access to HVAC runtime reports.
Some ENERGY STAR-certified smart thermostats have demonstrated energy-saving performance under the program’s certification criteria.
However, certification doesn’t guarantee a specific reduction in your bill.
A household already following an efficient manual schedule may see relatively little additional savings.
Check Compatibility Before Buying
Not every thermostat works with every HVAC system.
Pay particular attention to:
- Heat-pump compatibility.
- Auxiliary and emergency heating controls.
- Multistage heating and cooling.
- Line-voltage electric heating.
- Proprietary communicating HVAC systems.
- Whether a common wire, often called a C-wire, is required.
A C-wire supplies continuous low-voltage power to thermostats that need it.
Some installations require additional wiring or manufacturer-approved adapters.
Don’t assume a thermostat will work simply because it fits the existing wall location.
For unfamiliar wiring or incompatible equipment, hire a licensed electrician or qualified HVAC technician.
Can Utility Rebates Reduce the Cost?
Some electric and gas utilities offer rebates for qualifying smart thermostats.
Programs may have eligibility requirements involving equipment type, utility service area, and thermostat certification.
Some incentives also require participation in demand-response programs.
Demand response allows a utility to encourage or automatically make temporary changes in electricity consumption during periods of high demand, subject to program terms.
Review those terms before enrolling.
Check the ENERGY STAR Rebate Finder, DSIRE, or your utility’s current programs.
Programs vary by state and change often.
Realistic Costs & Savings
Thermostat adjustments can reduce heating and cooling costs, but savings depend on actual energy use.
Your total utility bill includes more than HVAC energy.
Lighting, appliances, water heating, electronics, and fixed utility charges may remain unchanged when you adjust the thermostat.
That distinction matters when estimating potential savings.
Worked Example: A 2,000-Square-Foot Home
Consider a hypothetical detached house with these characteristics:
| Assumption | Example value |
|---|---|
| Home size | 2,000 sq ft |
| Climate | Mixed heating and cooling |
| Electricity rate | $0.17/kWh |
| Annual electricity use | 12,000 kWh |
| Estimated HVAC electricity use | 5,000 kWh |
| Illustrative HVAC energy reduction | 5%–10% |
| Heating and cooling equipment | Electric HVAC |
A kilowatt-hour, abbreviated kWh, measures electricity consumption.
For example, a 1,000-watt appliance running for one hour uses approximately 1 kWh.
The 5,000 kWh HVAC consumption in this example is an assumption, not a national average.
Step 1: Calculate Annual HVAC Electricity Cost
Formula:
Annual HVAC electricity cost = HVAC electricity use × electricity rate
Using our example:
5,000 kWh × $0.17/kWh = $850 per year
Step 2: Estimate Potential Thermostat Savings
Suppose the household reduces annual HVAC electricity consumption by 5%–10%.
At 5%:
5,000 kWh × 0.05 = 250 kWh saved
250 kWh × $0.17 = $42.50 annually
At 10%:
5,000 kWh × 0.10 = 500 kWh saved
500 kWh × $0.17 = $85 annually
Under these assumptions, annual savings would be approximately $43–$85.
The upper end should not be treated as an expected result.
DOE’s commonly cited estimate of up to 10% applies to certain thermostat setback practices and heating-and-cooling circumstances, not every home.
How Much Could Different Homes Save?
The following table uses hypothetical annual HVAC electricity costs and an illustrative 3%–10% reduction.
| Annual HVAC electricity cost | 3% reduction | 5% reduction | 10% reduction |
|---|---|---|---|
| $500 | $15 | $25 | $50 |
| $800 | $24 | $40 | $80 |
| $1,200 | $36 | $60 | $120 |
| $1,800 | $54 | $90 | $180 |
| $2,500 | $75 | $125 | $250 |
These are mathematical scenarios, not savings predictions.
Actual savings could be smaller, and some households may see little measurable change.
What If You Have a Gas Furnace?
Natural gas is commonly billed in therms.
One therm represents approximately 100,000 British thermal units (Btu) of energy.
A Btu measures heat energy.
Suppose your furnace uses 600 therms annually, and your gas supply rate is $1.50 per therm.
Annual gas supply cost:
600 × $1.50 = $900
If thermostat changes reduced gas consumption by 5%:
600 × 0.05 = 30 therms
30 × $1.50 = $45 annually
This excludes fixed charges, delivery fees, taxes, and any other charges that don’t change proportionally with gas use.
It also assumes the 600 therms are attributable to space heating rather than other gas appliances.
How to Calculate Savings Using Your Utility Bill
Start by locating your electricity price per kWh or natural gas rate per therm.
If your bill separates supply and delivery charges, identify which charges vary with consumption.
A simple estimate is:
Potential savings = Annual HVAC energy use × Estimated reduction × Marginal energy rate
The marginal rate is the cost of using one additional unit of energy.
For time-of-use electricity plans, that rate changes depending on when you consume power.
You can estimate HVAC consumption using smart thermostat reports, utility interval data, submetering, or a professional home energy assessment.
If you don’t know your HVAC consumption, avoid applying a heating-and-cooling savings percentage to your entire utility bill.
What About Smart Thermostat Payback?
Suppose a smart thermostat costs $150 and professional installation costs $100.
Total installed cost:
$150 + $100 = $250
If it produces an additional $50 in annual savings compared with your previous thermostat behavior:
$250 ÷ $50 = 5 years
That is a simple payback estimate.
It excludes maintenance, replacement costs, changing energy prices, and the value of convenience features.
If the household already uses efficient settings, incremental savings may be much smaller.
Thermostat Settings for Different US Climates
The United States has dramatically different heating and cooling requirements.
A thermostat strategy that works well in Arizona may need modification in Minnesota or Louisiana.
Hot, Humid South
In states such as Florida, Louisiana, Mississippi, and parts of Texas, humidity management is particularly important.
Air conditioners remove moisture while cooling, but their ability to manage humidity depends on equipment design, runtime, and indoor moisture sources.
During extended absences, don’t automatically raise the thermostat to 85°F without considering humidity.
Monitor indoor relative humidity and aim to keep it below 60%, preferably within the EPA’s recommended 30%–50% range when practical.
If humidity remains high, a professional may recommend airflow adjustments, equipment repairs, or dedicated dehumidification.
Cold Northern States
In Minnesota, Wisconsin, Michigan, and other cold regions, winter heating often dominates household HVAC costs.
Nighttime setbacks can be useful with conventional furnaces.
However, pipe-freezing risks deserve attention during extended absences.
Poorly insulated exterior walls and crawl spaces may be much colder than the thermostat location.
Don’t rely exclusively on a single thermostat reading to protect plumbing.
Hot, Dry Western States
Parts of Arizona, Nevada, and inland California experience high daytime temperatures and comparatively dry conditions.
Solar heat gain through windows can significantly increase cooling demand.
Exterior shading, appropriate window coverings, and air sealing can complement thermostat adjustments.
In dry climates, evaporative coolers may also be used.
An evaporative cooler uses water evaporation to cool incoming air. Its effectiveness depends heavily on outdoor humidity and proper ventilation.
Thermostat guidance for conventional central AC doesn’t necessarily apply to evaporative cooling systems.
Mild Coastal Climates
Some coastal regions have relatively moderate outdoor temperatures.
Homes in these areas may be able to reduce mechanical cooling through nighttime ventilation when outdoor air is cooler, cleaner, and sufficiently dry.
However, opening windows isn’t appropriate during wildfire smoke events, poor outdoor air quality, or unsafe outdoor conditions.
Mixed Climates
States such as Pennsylvania, Virginia, Missouri, and parts of the Midwest experience substantial heating and cooling seasons.
A seasonal thermostat schedule can work well.
Use higher cooling settings during summer and lower heating settings during winter, while considering humidity, equipment type, and household comfort.
Why Your HVAC System Runs Constantly (And How to Fix It)
Sometimes adjusting the thermostat doesn’t produce the comfort or savings you expect.
Your system may run for long periods because of outdoor temperatures, poor insulation, restricted airflow, or equipment problems.
Long runtimes aren’t always a sign of failure.
Modern variable-capacity heat pumps and air conditioners may intentionally run at lower output for extended periods.
However, a system that can’t maintain a reasonable indoor temperature deserves investigation.
Check These Items First
| What to check | DIY-safe action | When to seek help |
|---|---|---|
| Thermostat settings | Confirm heating, cooling, and fan modes | Controls behave unexpectedly |
| Air filter | Inspect and replace according to manufacturer instructions | Filter becomes dirty unusually quickly |
| Supply vents | Remove furniture or rugs blocking airflow | Multiple rooms receive weak airflow |
| Return grilles | Keep accessible grilles unobstructed | Persistent airflow problems |
| Windows and doors | Check for obvious drafts | Major leaks or damaged assemblies |
| Indoor humidity | Measure with a hygrometer | Persistent humidity above 60% |
| Outdoor AC unit | Remove loose debris nearby without opening equipment | Ice, unusual noises, or visible damage |
| HVAC runtime | Track temperature and operating patterns | Equipment cannot maintain setpoint |
Dirty Filters Can Increase Energy Use
A clogged HVAC filter restricts airflow.
Depending on the system, restricted airflow can reduce performance and contribute to equipment problems.
Check the manufacturer’s filter replacement recommendations.
Some filters require replacement monthly under heavy use, while others can last longer.
Choose a filter compatible with your HVAC equipment rather than automatically purchasing the densest available option.
Insulation and Air Sealing Matter
Insulation slows heat transfer through walls, ceilings, and floors.
Its thermal resistance is expressed as R-value.
A higher R-value generally means greater resistance to heat flow.
However, effective insulation depends on installation quality, climate, and where the insulation is located.
Air sealing reduces unwanted air movement through cracks and openings.
These improvements can reduce the amount of heating and cooling required to maintain your chosen thermostat setting.
For a deeper explanation, see our related guide: Home Insulation Guide: Where to Add Insulation First.
When HVAC Replacement Becomes Relevant
If your system is aging, frequently breaking down, or struggling to maintain comfort, professional evaluation may be worthwhile.
Modern air conditioners use efficiency ratings such as SEER2.
SEER2 stands for Seasonal Energy Efficiency Ratio 2. It measures seasonal cooling efficiency under updated federal testing procedures.
Higher SEER2 ratings generally indicate better cooling efficiency under standardized conditions.
Heat pumps also use HSPF2, or Heating Seasonal Performance Factor 2, to describe seasonal heating efficiency.
Actual operating costs still depend on installation quality, weather, ductwork, thermostat settings, and electricity prices.
Before replacing equipment, request multiple written estimates and consider whether duct leakage, insulation, or control problems are contributing to discomfort.
Related reading: Heat Pump vs. Central Air Conditioner: Costs and Efficiency.
Renter-Friendly Ways to Improve Comfort
Renters may have limited control over HVAC equipment, insulation, and thermostat replacement.
Fortunately, several low-cost strategies don’t require permanent modifications.
Start With Reversible Improvements
Consider using:
- Removable window coverings.
- Draft stoppers at exterior doors.
- Plug-in fans.
- A portable hygrometer.
- Weatherstripping where permitted by your lease.
- A programmable thermostat, but only with landlord approval and appropriate installation.
Thermal curtains can reduce unwanted heat gain or loss through windows.
However, actual performance depends on window construction, curtain fit, and how they’re used.
Ask About Thermostat Access
Some apartments use centralized heating or cooling controls.
If your unit doesn’t allow independent temperature adjustment, ask property management about the building’s temperature policies and maintenance procedures.
Document recurring comfort issues, particularly when heating or cooling appears inadequate.
Be Careful With Space Heaters
Portable electric space heaters can provide localized warmth, but they consume electricity and introduce fire risks.
The U.S. Consumer Product Safety Commission recommends keeping combustible materials at least 3 feet away from portable heaters.
Plug space heaters directly into wall outlets rather than extension cords or power strips.
Never leave them operating unattended or while sleeping.
A space heater isn’t automatically cheaper than central heating.
Electric resistance heaters convert electricity into heat, while many heat pumps can deliver multiple units of heat for each unit of electricity consumed.
That ratio is called the coefficient of performance, or COP.
For example, a heat pump operating at a COP of 3 delivers approximately three units of heat for every unit of electrical energy used.
The actual COP changes with outdoor temperature and equipment conditions.
When to Call a Professional
Thermostat adjustments are generally safe, but some HVAC problems require qualified help.
Contact a licensed HVAC technician when:
- Your system cannot maintain reasonable temperatures.
- Heating or cooling stops unexpectedly.
- Your heat pump frequently activates auxiliary heat under normal conditions.
- Your AC develops ice on refrigerant lines or indoor coils.
- You notice unusual electrical smells or equipment noises.
- Indoor humidity remains persistently high.
- Your thermostat is incompatible with existing HVAC controls.
- Different rooms have major temperature differences despite unobstructed vents.
Hire a licensed electrician for electrical wiring or circuit problems.
Refrigerant handling, gas connections, and HVAC electrical repairs should be performed by appropriately qualified professionals.
Carbon Monoxide Safety
Fuel-burning furnaces and other combustion appliances can produce carbon monoxide if they malfunction or vent improperly.
Carbon monoxide is an odorless, colorless gas that can be deadly.
Install carbon monoxide alarms according to manufacturer instructions and applicable local requirements.
If a carbon monoxide alarm sounds, follow its emergency instructions, move to fresh air, and contact emergency services or the appropriate emergency responder.
Don’t attempt to diagnose or repair a suspected combustion problem yourself.
Consider a Professional Home Energy Assessment
A home energy assessment evaluates how a building uses and loses energy.
Depending on the service, it may include insulation inspection, airflow measurements, duct evaluation, and building leakage testing.
Some assessments use a blower door, a specialized fan that measures how much air leaks through the home’s exterior enclosure.
A professional assessment can help identify whether thermostat changes, insulation, duct repairs, or HVAC improvements are likely to offer the greatest benefit.
Common Mistakes to Avoid
Even a well-designed thermostat schedule can be undermined by a few common habits.
1. Setting the Thermostat Extremely Low to Cool Faster
Setting the AC to 60°F doesn’t generally make a conventional single-stage system cool faster than setting it to 75°F.
It can simply cause unnecessary cooling if you forget to change it back.
2. Using Aggressive Winter Setbacks With Heat Pumps
Large setbacks can trigger inefficient auxiliary heating on some systems.
Check equipment recommendations and use heat-pump-compatible controls.
3. Ignoring Indoor Humidity
A home can feel uncomfortable or develop moisture problems even when its temperature appears reasonable.
Monitor relative humidity, especially in hot, humid climates.
4. Leaving the Fan Set to ON Without Understanding the Tradeoffs
The thermostat’s ON setting usually runs the indoor blower continuously.
AUTO generally operates the blower when heating or cooling is needed.
Continuous fan operation may improve air circulation in some systems, but it consumes electricity and can affect indoor humidity.
5. Blocking Supply or Return Vents
Furniture, rugs, and other objects can restrict airflow.
Keep accessible vents and return grilles clear.
6. Assuming Smart Thermostats Guarantee Savings
A smart thermostat is a control device, not an insulation upgrade.
Its value depends on compatibility, scheduling, user behavior, and HVAC performance.
7. Comparing Utility Bills Without Accounting for Weather
A hotter summer can increase cooling consumption even when your thermostat schedule improves.
Compare energy use over similar weather periods when possible.
8. Choosing Savings Over Necessary Indoor Comfort
Some households need tighter temperature limits for health, safety, or caregiving reasons.
Maintain temperatures appropriate for everyone in the home.
FAQ
1. What is the best thermostat setting to save money year-round?
For many households, a practical starting point is 76°F–78°F during summer cooling and 68°F–70°F during winter heating while home. Conventional systems may benefit from setbacks during sleeping or away periods. The most economical temperatures depend on climate, insulation, HVAC equipment, humidity, and comfort needs.
2. Is 78°F a good thermostat setting for summer?
Yes, 78°F is a commonly recommended starting point for energy-efficient summer cooling. However, it may feel too warm for some households, particularly when indoor humidity is high. Try adjusting the temperature gradually while using fans and window coverings. Maintain appropriate indoor conditions for people who are sensitive to heat.
3. Is 72°F too high for winter heating?
No. A 72°F winter setting may be appropriate for households that need or prefer warmer indoor temperatures. It will generally require more heating energy than maintaining 68°F under otherwise similar conditions. If comfortable, try lowering the temperature by 1°F–2°F and monitor the result rather than making a large change immediately.
4. What temperature should I set my thermostat to when I’m not home?
For conventional systems, consider around 80°F–85°F during summer cooling and 60°F–65°F during winter heating for a typical workday absence. These ranges require adjustment for humidity, freeze protection, pets, health needs, and equipment type. Heat pumps may perform better with smaller winter setbacks or steady temperatures.
5. Does turning the thermostat down at night really save money?
It can, particularly with conventional heating systems. Lowering the indoor temperature reduces the rate of heat loss during cold weather. DOE estimates suggest suitable thermostat setbacks can save up to 10% annually on heating and cooling. Actual savings vary, and large winter setbacks can be counterproductive for certain heat pumps.
6. Is it cheaper to leave the AC running all day?
Not necessarily. Raising the cooling setpoint while you’re away can reduce energy consumption because the system maintains a smaller indoor-outdoor temperature difference. However, humidity control, recovery time, equipment type, and household needs matter. Completely shutting off AC during humid or extremely hot weather isn’t always appropriate.
7. Should I turn my thermostat off when I go on vacation?
Usually, maintaining a protective temperature is safer than shutting heating or cooling off completely. During winter, frozen pipes can become a concern. During summer, excessive indoor heat and humidity can damage belongings or create moisture problems. Choose settings based on local climate, building conditions, and any property-management requirements.
8. Do smart thermostats actually lower electricity bills?
Smart thermostats can help reduce electricity consumption when their scheduling, occupancy, and remote-control features prevent unnecessary heating or cooling. However, households already using efficient schedules may see limited additional savings. Look for equipment compatibility, useful controls, ENERGY STAR certification where applicable, and available utility rebates.
9. Is it better to keep the thermostat at one temperature?
That depends on your HVAC equipment and routine. Conventional furnaces and air conditioners can often save energy through scheduled setbacks. Some heat pumps operate more efficiently with steady winter temperatures because large increases can activate auxiliary heat. If your home is continuously occupied, smaller temperature adjustments may be more practical.
10. How many degrees should I change my thermostat to save money?
DOE guidance identifies potential savings from setbacks of approximately 7°F–10°F for eight hours daily in suitable circumstances. However, that isn’t a requirement for every system. Start with a smaller adjustment, perhaps 2°F–4°F, then evaluate comfort and energy use. Heat-pump owners should follow equipment-specific recommendations.
11. Why does my AC run constantly even when the thermostat is set correctly?
Possible causes include extreme outdoor heat, poor insulation, air leaks, dirty filters, undersized equipment, or mechanical problems. Some variable-capacity systems intentionally operate for long periods at reduced output. If your AC cannot maintain its set temperature, develops ice, or shows unusual operating behavior, arrange a professional inspection.
12. Can changing my thermostat save $100 a year?
It’s possible, but not guaranteed. A household spending $1,500 annually on heating and cooling would need to reduce those costs by approximately 6.7% to save $100. Whether that happens depends on equipment, climate, schedule, energy prices, and existing thermostat habits. Use your actual utility rates and HVAC consumption to build a realistic estimate.
Final Thermostat Efficiency Checklist
The best thermostat setting is one you can maintain comfortably while avoiding unnecessary heating and cooling.
For most households, the biggest opportunities come from combining reasonable temperatures with consistent scheduling and basic HVAC maintenance.
Use this checklist to get started:
- Start near 78°F for summer cooling and adjust for comfort.
- Try 68°F–70°F for winter heating while awake.
- Create a consistent weekday and weekend schedule.
- Use appropriate away settings without risking frozen pipes or excessive humidity.
- Avoid aggressive winter setbacks on heat pumps unless supported by the equipment.
- Keep HVAC filters and accessible vents maintained.
- Monitor indoor humidity, especially during summer.
- Check utility bills and compare energy consumption over time.
- Investigate persistent comfort problems before replacing equipment.
- Review current utility rebates before purchasing a smart thermostat.
You don’t need perfect settings from day one.
Start with a comfortable temperature, make small adjustments, and observe how your home responds.
Over time, an efficient thermostat routine can become an easy part of managing household energy costs.